Sunday, July 7, 2013

Belkin WeMo – my foray into Home Automation

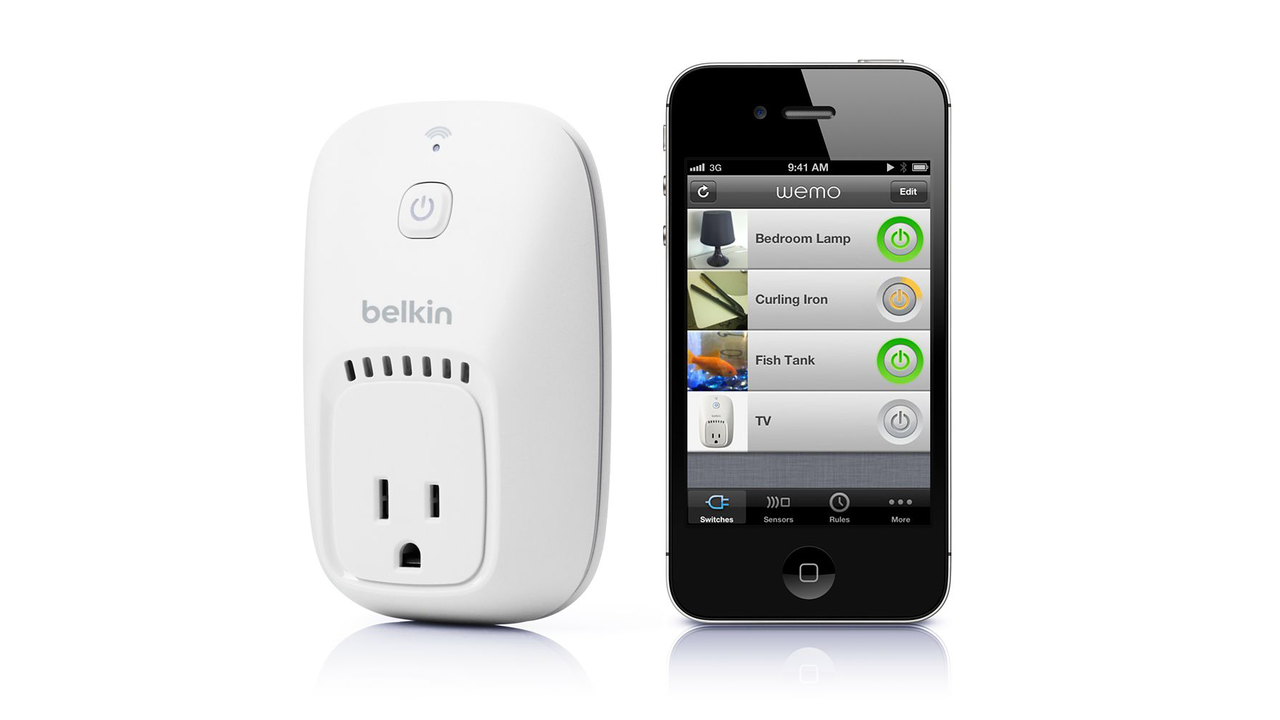
Belkin WeMo - a useful device for remotely controlling mains connected devices

Over time, I've added a number of constant on components to my home. Ranging from Sonos speakers to added Airport Express access points, my core level of electrical usage has increased to the extent it's become unreasonably expensive. It's good to love the gadgets, but the run costs should also be kept in check.

I'd seen the Belkin Wemo units and wondered about its value, considering the relative high cost for each switch (£35 in the UK). But a course, the temptation of adding new gadgets on my home network while being able to reduce running costs was too good to bear.

I've got 6 WeMo units in place, mainly adding the capability to switch the home theatre, Loft and Bedroom Sonos speakers and Airport access points off and on based on my own time schedule.

Initial indications from my old Wattson, show a 50% drop at night in KWh being used, which will only get better given the relatively few hours the units are on during the evenings and weekends.

Setting up the WeMo's were relatively straightforward.  They employ a rather neat and easy setup routine.  Each WeMo acts as switch and emits its on open Wi-Fi access point which you join and then run the WeMo software to configure.  It seems to run only on the 2.4Ghz wireless N band which my main Billion router runs on, so I had some issues with weak spots around my house (as opposed to my Airport access points which run the 5Ghz band).

The overall set up took easily more than 30 minutes due to the firmware upgrade on the WeMo's which need to be completed on each one. The firmware upgrade didn't always go smoothly.  Often, the app status screen appeared to still say firmware was upgrading, despite the WeMo itself switching itself off as part of the process. Something for Belkin to improve.

Other notable features are its range of integration possibilities with IFTTT which to be honest, I've not had the time or the inclination to investigate at this time (largely due to other product reviews I'm working on). An simple example is to send me an email when any of the WeMo units turn on.

In terms of product platform, the WeMo product offers a good base for improvements and added capabilities in the future. One such area would be to add energy monitoring and reporting from each switch. No signs this is an area Belkin may ever want to go into, but we live in hope.  

From an app perspective, an Android Beta is current available (release notes suggest it's for the Samsung Galaxy S3, though it works on HTC One). As a beta it's buggy and needs polishing, and Belkin advise there will be a full release version this year. Strangely though, there is no PC app/browser way to control the switches and no indication that Belkin will release one. How times have changed.

I should mention there is a Motion controller companion product which adds obvious capabilities in activating the WeMo's based on motion detected in that room. Lots of automation possibilities based on that. Bulky and awkward looking, I did not opt to use one of these units.

So overall, I'm reasonable happy. Design-wise, it's a bulky unit, made to look further ugly when you add cube extension to its to control a group of electrical items running off the same WeMo, but useful nonetheless. 

So I can schedule when they activate and override them, even when I'm away from home. And it's reducing my core electric costs. For a ~£200 outlay for 6 x WeMo, my foray into Home Automation has finally started. Time will tell how well these work out, though it feels right.


Now, where's that Nest Thermostat launch for the UK market?

Sound bars reloaded – the Sonos Playbar

Make no bones about this - this is a seriously impressive 5.1 surround system

It's been 18-months since my first post on this blog, when I started with a look the Bose Cinemate 1SR which saw me move on to the Yamaha YSP220 sound bar. Since then, the Yammy has been a solid performer for my Sky TV, media streamers (Apple TV, Boxee, Airplay on a Mac). As a wired single box and sub solution, it did the trick and has added much enjoyment to my movie, sports and general TV watching.

As a solution for music playback, it failed miserably.  I did try putting a Sonos Connect on it to use it as a zone, but unfortunately, it exposed the Yammy's focus on cinema digital sound processing (DSP), which even when disabled, is very unsuited to listening to music.

Since Sonos released the Playbar earlier in 2013, and it being warmly received by the media, the question of course was, how would it fare against the Yammy and would I want one longer term.

Reading the more technical reviews, the key blocker for me was would it  process 5.1 audio from my inputs to recreate a fully 5.1 sound field.

As normal for me, my aim here is not to extensively review the Playbar per se, but for interested readers, talk about my experience with it, vis-a-vis being an existing sound bar owner.

Bulky but luxurious build

Compared to both the Bose and Yammy, the Playbar has a larger form factor and dare I say it, feels bulkier. It's height may be a problem for some TV sets, given the dimensions of a TV's fit and lower screen in relation to the height of the Playbar.

That said, as you'd expect from Sonos, it has a luxury feel and strong build quality.

Simplified setup

Thinking back to the Bose and Yammy, the set ups for both involved reading instructions and running through calibration routines with accessories to optimise the virtual surround modes which both systems employ. The Bose uses the Sonos approach which is to focus on sound integration via co-axial or optical (Toslink) inputs.  Unfortunately, it cops out and does not go further with integrating with TV set remotes, and instead decides to supply its own remote, which fails itself as it provides no visual indication on the sound level when in use.

The Yammy on the other hand, acts like an AV receiver and requires all HDMI sources to route through it and a HDMI output via the ARC channel. It's advantage is that for switching sources, you can simply press the input button on the sound bar. It's disadvantage is that Sky HD copy protection does not allow switching capability when you've chosen another source.  A compromise being reached when you need to use your TV remote to forcibly switch HDMI back to the Sky input.  Beyond that, the Yammy works very well, has been cited for UK home cinema awards and for the price is unbeaten for a 3.1 Dolby Digital and DTS surround system.

In a very Apple-esque way (in fact a wonderfully Sonos way), Sonos have aimed for simplicity and it must be said, really cracked it. In both 3.0, 3.1 and 5.1 set up, setting up the Playbar by itself, or alongside the Sub and Play 3 surrounds is gorgeously easy. Using the iOS app, includes a deceptively simple set of steps for the Playbar to learn the remote of both my Sky+ remote and my Sony TV.

It's the small things

My main technical requirements check was to understand how the Playbar would work with my existing kit in terms of processing stereo and 5.1 discrete audio via its optical digital input.

As luck would have it, my Sony 40 inch 1080p panel outputs Dolby Digital 5.1 via optical. Even better luck my Samsung DRX890 Sky HD+ satellite receiver must have received a software update some time ago to output Dolby 5.1 over HDMI. The screenshot below is how you know:

In the UK, Sky has released a software patch to enable
Dolby Digital over HDMI - a real boon for the Playbar
This is important because it meant that Sky, the Apple TV, Boxee box and my Blu ray would pass the 5.1 Dolby Digital (DTS audio is not supported on the Playbar - at least not yet) and voilĂ  straight into the Playbar.

Other niceties include wireless IR sensors which work to transmit the remote signal through the Playbar to the TV. The Yammy uses a wired approach which is flimsy to fix on to your TV.

Seriously impressive sound

My experience of the Playbar varied dependent on the setup. My own usage has been either paired with the Sonos Sub as 3.1 solution or more recently as a full 5.1 solution when I added as pair or wall mounted Play: 3's (using the very good Flexon brackets)

The sound is bigger, bolder, more naturally open and detailed that the Yamaha YSP220 sound projector. This may be as a result of the removal if the digital sound processing you historically find in Yamaha receivers.

The gain on the Playbar is considerably louder. I barely get up to volume 10 during the day and hover around levels 3-5 during the evening. A night-time mode is one screen press away to compress the dynamic range for late night watching when you live with others. A speech mode also adds gain on the dialogue which sits on the centre channel for those moments when your partner tells you they can't hear the on screen dialogue :)

For both music and TV, this is undoubtedly the best solution I have ever experienced. Even thinking back to the Laser Disc and early US DVD days of the late 1990's, paired with the Yamaha DSP3090 king of an AV amp and a 5.1 wired speaker in those days (B&Ws of course), I've can't remember even being so satisfied with both the performance, portability and convenience of setting it up.  The fact that the sound is delivered wirelessly I consider an astonishing feat of engineering.

If you're a Sonos lover

This is a no brainer. Get one, immediately if you have a Sub and want to add enjoyable grunt to your TV, Movie and Music playing experience.

If you're looking around for a Playbar, then on it's own, this is expensive and the Yammy can be considered a better match for pseudo 5.1 system which also supports a sub woofer.

For everyone else

From a 3.1 comparison standpoint, the Playbar + Sub sits in the Bose price range. By the time you add the Play: 3's as surrounds you're in the luxury mid to higher end area, As in many cases, you get what you pay for. If you can stretch to the Sonos + Sub + Surrounds, you're going to love this.


Spring Cleaning with SSD

Solid State Drives are an expensive way to give longer life to your PCs - as it did with my 2008 iMac

Earlier this year, I set about resolving some long standing issues with my 2008 iMac by giving it a spring clean fresh install with Mountain Lion.  It removed a lot of build issues and legacy OS files from my iMac given its original Leopard install. And while I was happy with a return to its original snappiness back in 2008, I was still weighing up upgrading over the short term to the 2012 iMacs for even better performance.

Faced with choices for upgrading and adding new tech and gadgets in the coming year, it occurred to me that there may be a a more effective route to getting more bang for the buck on the iMac front.  Cut a long story short, I identified OCZ as one of a number of recommended vendors to use in upgrading the iMac disk drive.

The choice ultimately came down between the DIY approach (with various downside risks for open heart surgery on the iMac without the necessary equipment and dust-free environment) and using a Apple Maintenance provider to perform the work.

Ensuring I took a clean back up with SuperDuper!, this was a relatively straightforward exercise and I had the machine back in few days.

Since restoring data and reinstalling my applications, the value of its performance is not found in benchmarks such as GeekBench, which still rates the 64-bit iMac the 4500-4800 range. With machine start up in less than 20 seconds, applications loading in less than 3 seconds mean a far better snappiness and overall satisfaction of using my iMac. It also increases the life to the machine ahead of being able to handle the forthcoming OS X 10.9 Mavericks release, with its focus on more performance and user based enhancements.

Upgrading the iMac to a 2012 and beyond release is now unlikely to happen for another 12-24 months at the very least.

Recommendation?  Put SSDs in any old PC you night have if you want to prolong its life. Not the most original article I've posted, but worth spelling out the experience and the benefits to readers thinking about it.